Top Up Balance
Customers can easily top up their balance within the GO4Network platform. Follow the step-by-step guide below to complete the process:
Prerequisites
Before you begin, ensure you have:
- Logged in to your GO4Network account and are on your console dashboard.
Steps to Top Up Balance
1. Access the Account Menu
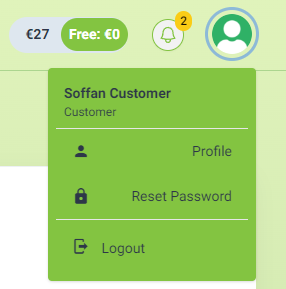
- Click on your profile icon in the top right corner to open the dropdown menu.
- Select "Profile" from the menu.
2. Navigate to Billing Overview
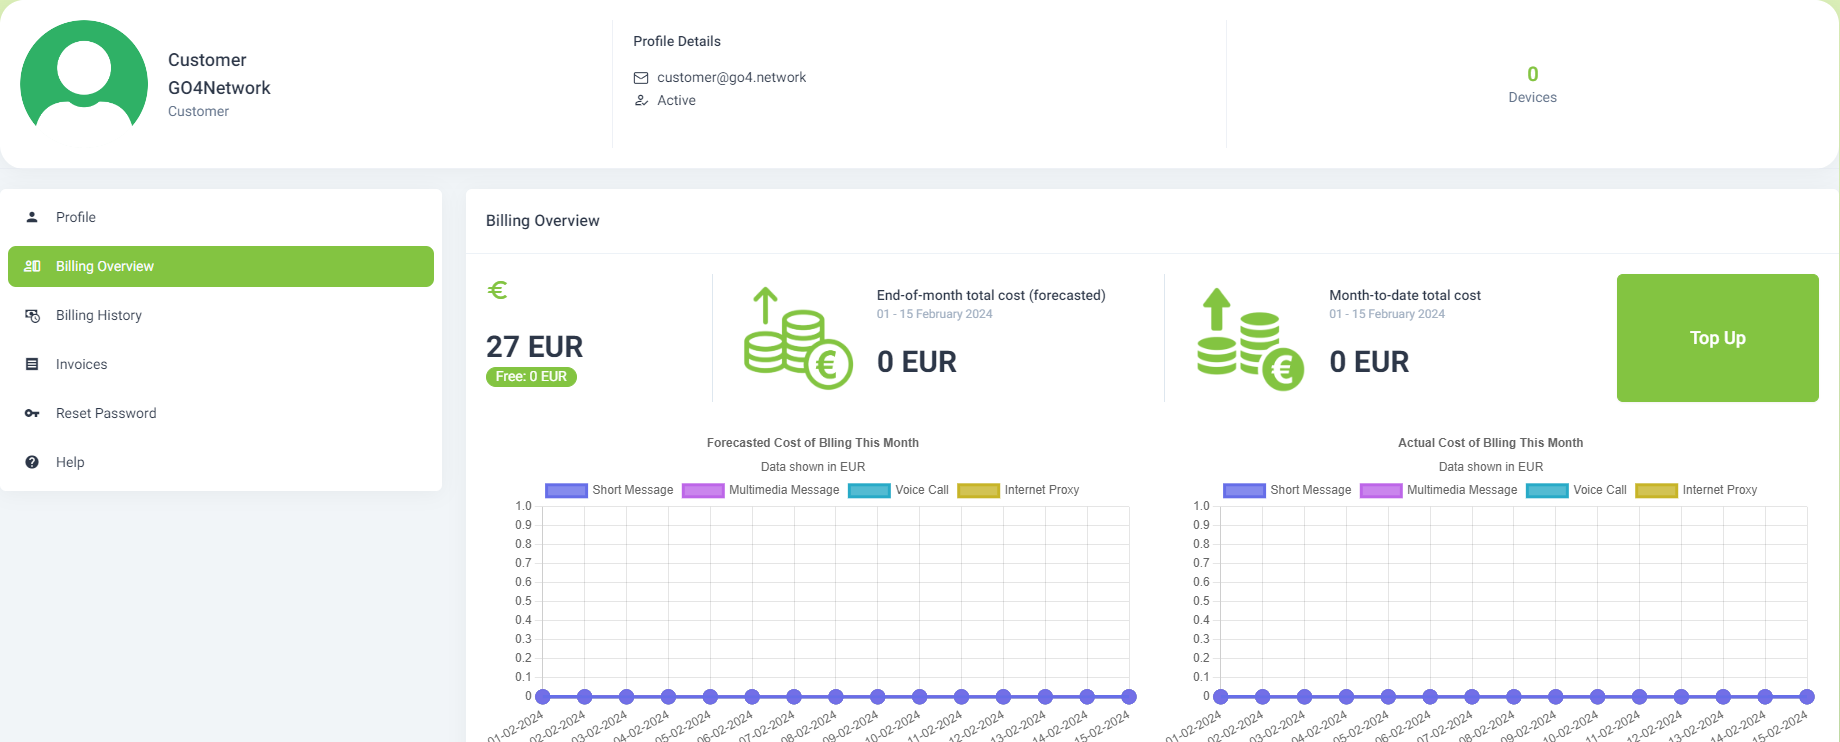
- Within your profile, go to the "Billing Overview" menu.
3. Initiate Top Up
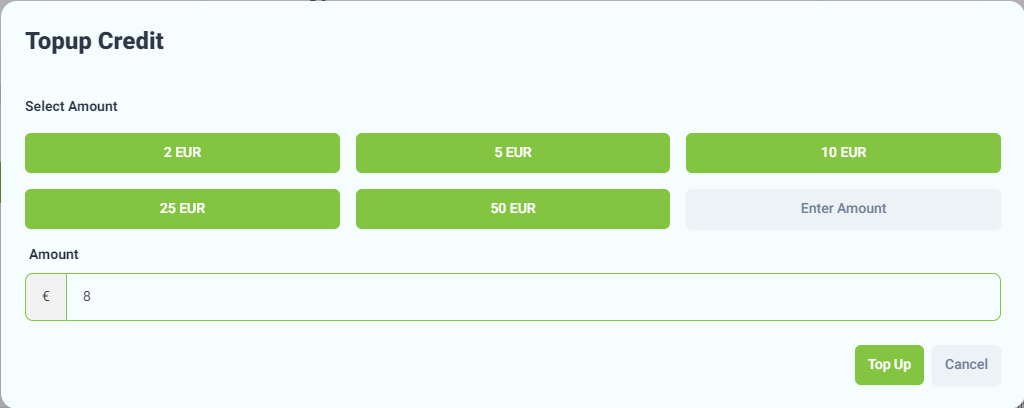
- Click on the "Top Up" button. This action will open the "Top Up Credit" popup.
4. Select Top Up Amount
- Choose a predefined amount (2, 5, 10, 25, 50 EUR).
- Alternatively, input a custom amount by selecting "Enter amount" and filling in the desired value.
5. Complete the Top Up
- Click the "Top Up" button. You will be redirected to the Invoices menu in your profile.
6. View Invoice Details
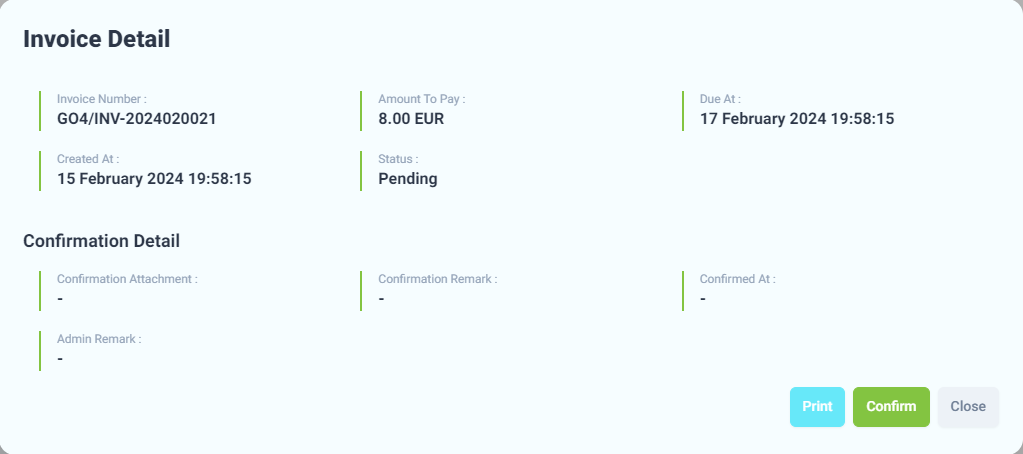
- The system will display an Invoice Detail containing:
- Invoice Number
- Amount to Pay
- Due At
- Created At
- Status
7. Invoice Detail Actions
- Three action buttons are available in the Invoice Detail modal:
- Print: Generates a PDF of the Invoice.
- Confirm: Initiates Payment Confirmation modals.
- Close: Hides the Invoice Detail modal.
8. Payment Confirmation Modals
- These modals include fields for Confirmation Attachment (upload payment proof image) and Confirmation Remark (notes from the customer).

9. Await Admin Confirmation
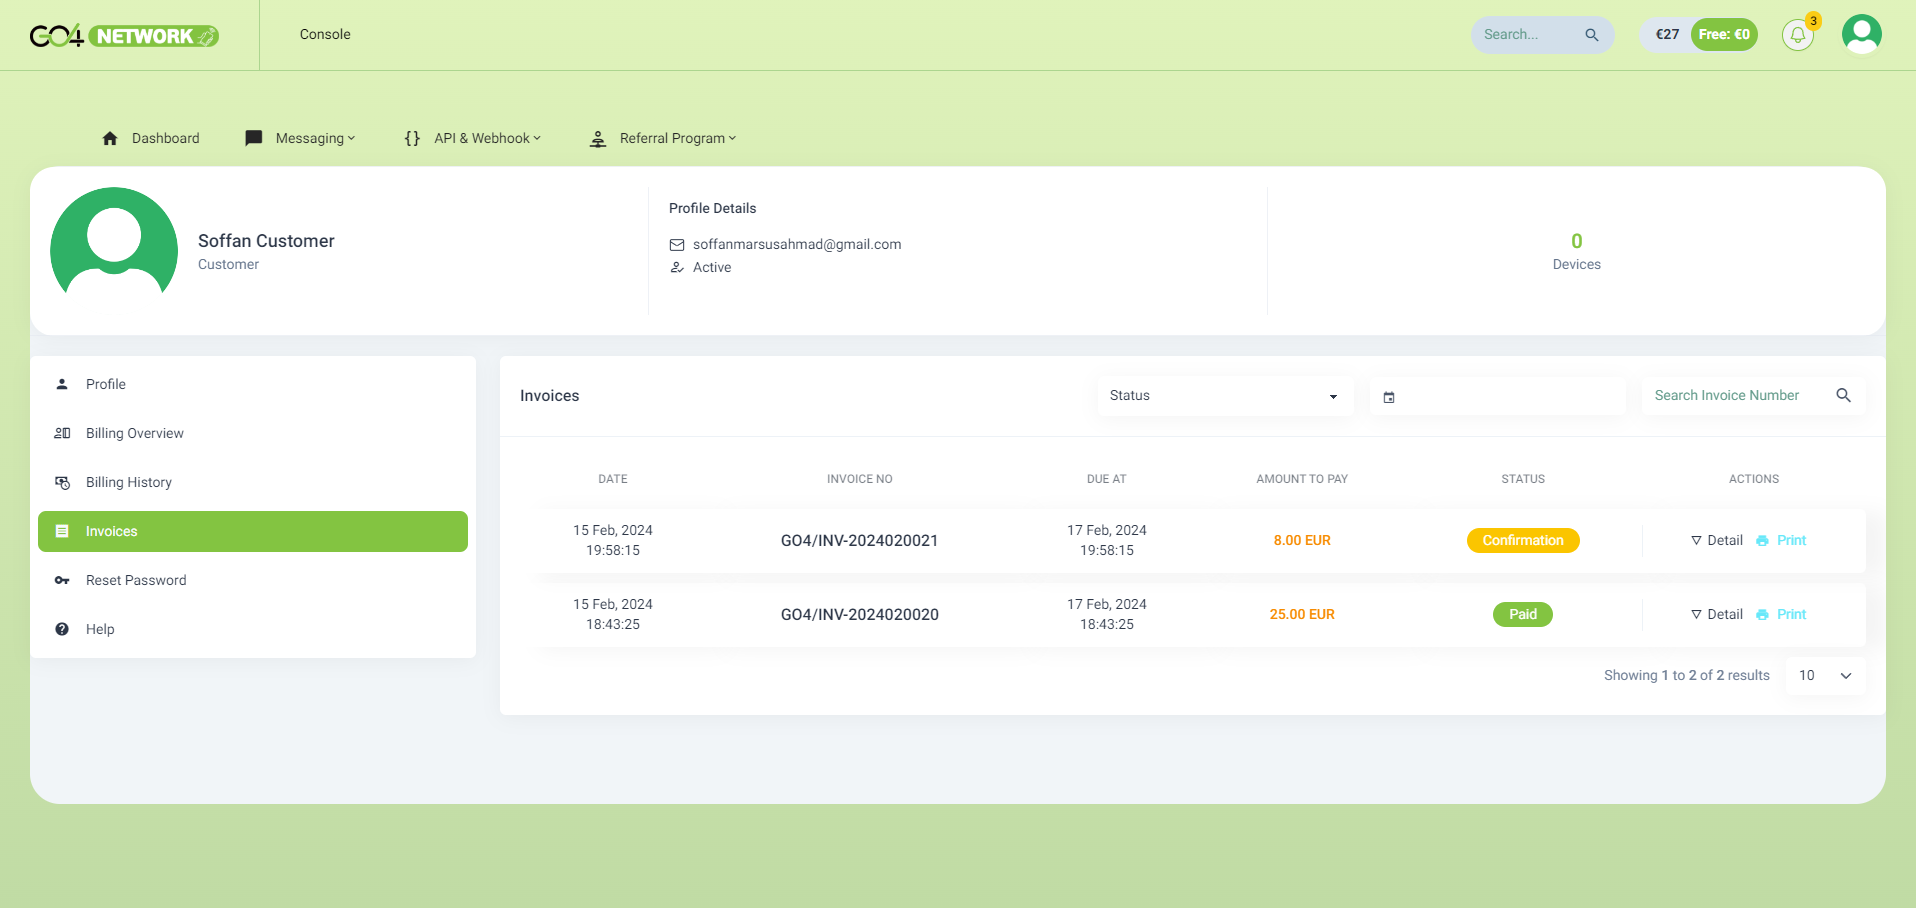
- After confirming attachment and remark, await admin confirmation to verify the payment. Monitor the invoice status in "Profile" -> "Invoices."
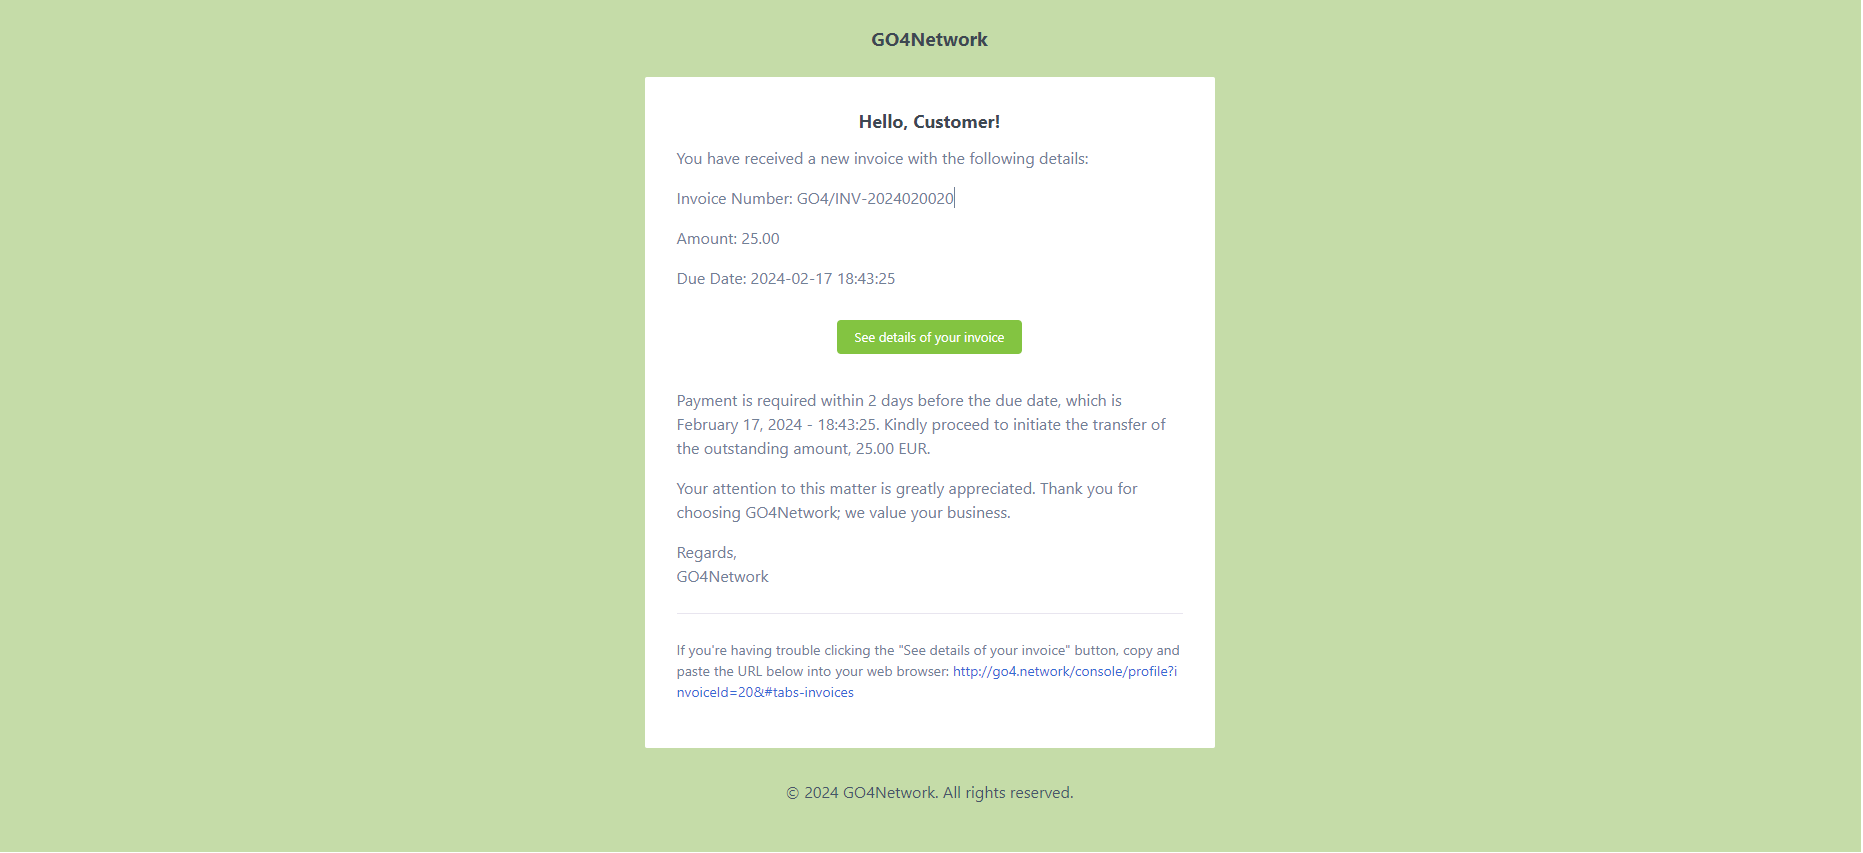
10. Receive Email Notification
- Customers will receive an email about the invoice and a reminder to pay within two days before it expires.
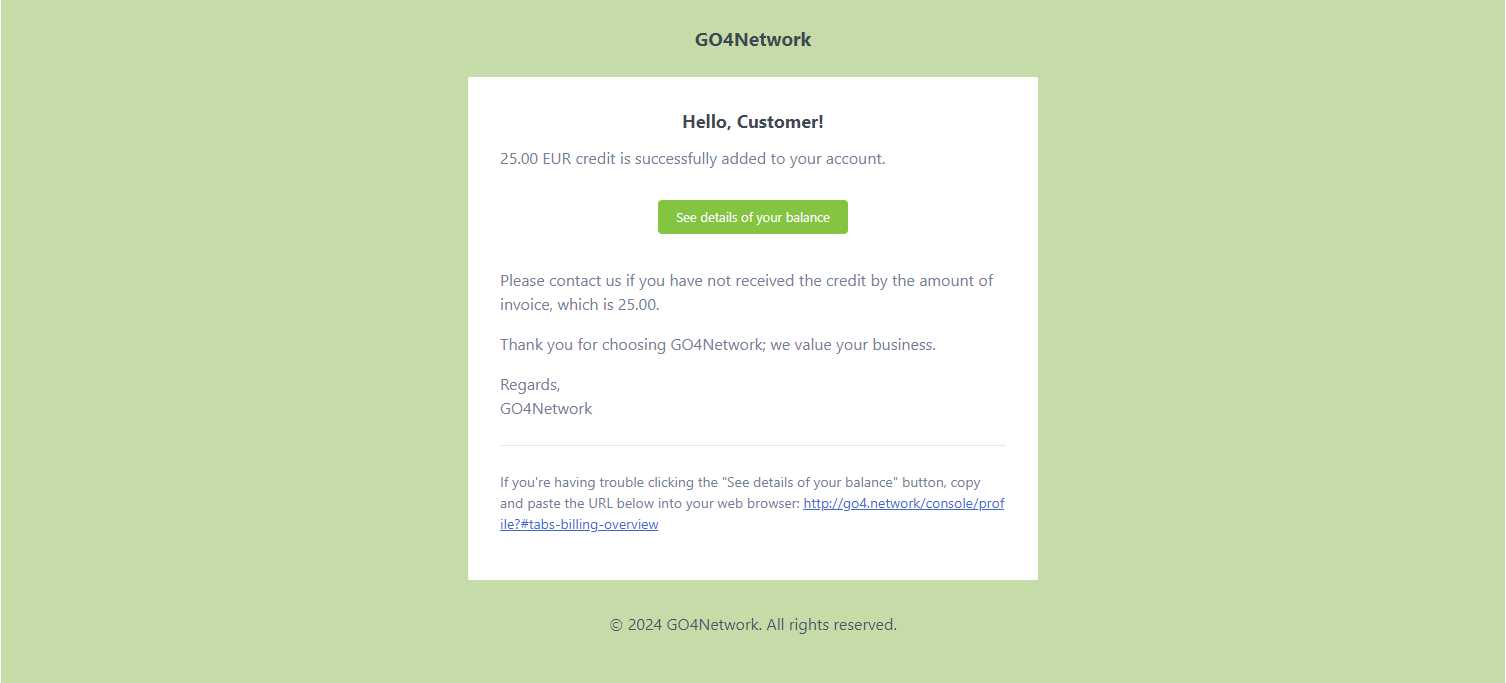
11. Admin Confirmation
- Once the admin confirms the invoice, the status will change to "Paid." The customer's balance will be automatically added to their account.
If you have any questions or encounter any issues, feel free to reach out to our support team for assistance.